In today’s competitive landscape, giving your sales team smart tools is vital. One such game-changer is the Sales Qualification Agent — a smart assistant that simplifies lead evaluation and personalized outreach. But before your team can fully benefit, proper setup is key.
Business Use Case
A fast-growing software solutions company was onboarding new sales reps monthly. However, onboarding was slow and inconsistent — lead research, ICP identification, and email drafting relied heavily on senior team members.
To fix this, the company deployed the Sales Qualification Agent. They configured it with their offerings, Ideal Customer Profile (industry, company size, location, revenue), and outreach goals. The result? Reps could instantly qualify leads and create tailored first-touch emails — saving time and boosting efficiency.
Before You Begin: Prerequisites
Make sure you have:
Admin access to Dynamics 365 Sales
A valid Copilot Studio license
The Sales Hub app with the modern UI
Copilot enabled in Dynamics 365 Sales (recommended)
A custom or existing security role with user-level permissions (read, write, create, append, append to, assign) for:
Setup: Configuring the Sales Qualification Agent
Once prerequisites are met, follow these steps:
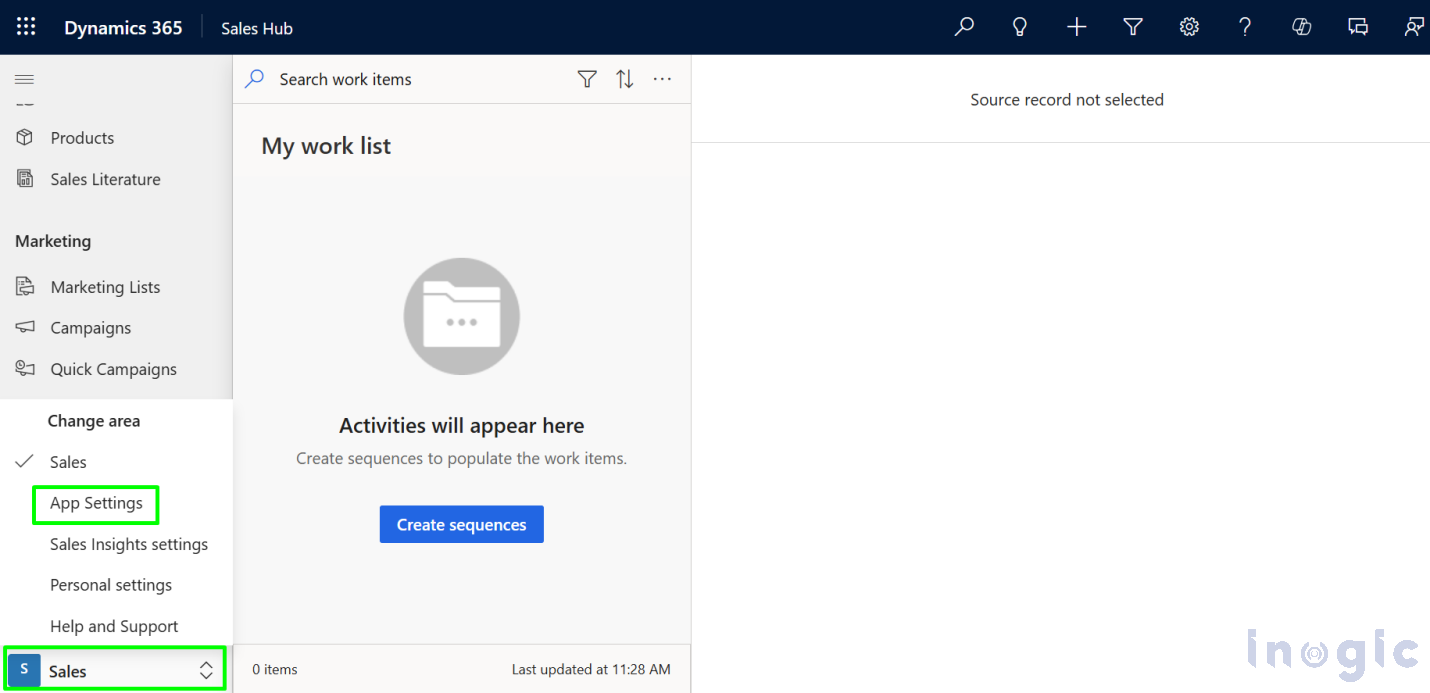
1. Open the Sales Hub app, navigate to the bottom-left corner, and click on Sales → App Settings.
Read More>>


