To manage customer interactions effectively in Dynamics 365, it’s essential to have all relevant files—documents, screenshots, and other supporting materials—readily accessible. One way to enhance this process is by using the Attachment Control on forms.
The Attachment Control is a versatile UI element that enables customer service reps (also known as agents) to upload and view file attachments directly within the Case form in Dynamics 365 Customer Service.
Though primarily intended for the Case entity, this control can also be added to other forms like Account, Contact, or Lead. In such cases, it enables users to view—though not upload—attachments from related emails or notes, providing a consolidated view of customer-related content.
Note: File upload functionality is exclusive to Case forms. On other entities, the control is limited to displaying attachments in a read-only format.
Steps to Add the Attachment Control to a Form:
Open Power Apps and navigate to the entity form where the control should be added.
Access the desired form in edit mode.
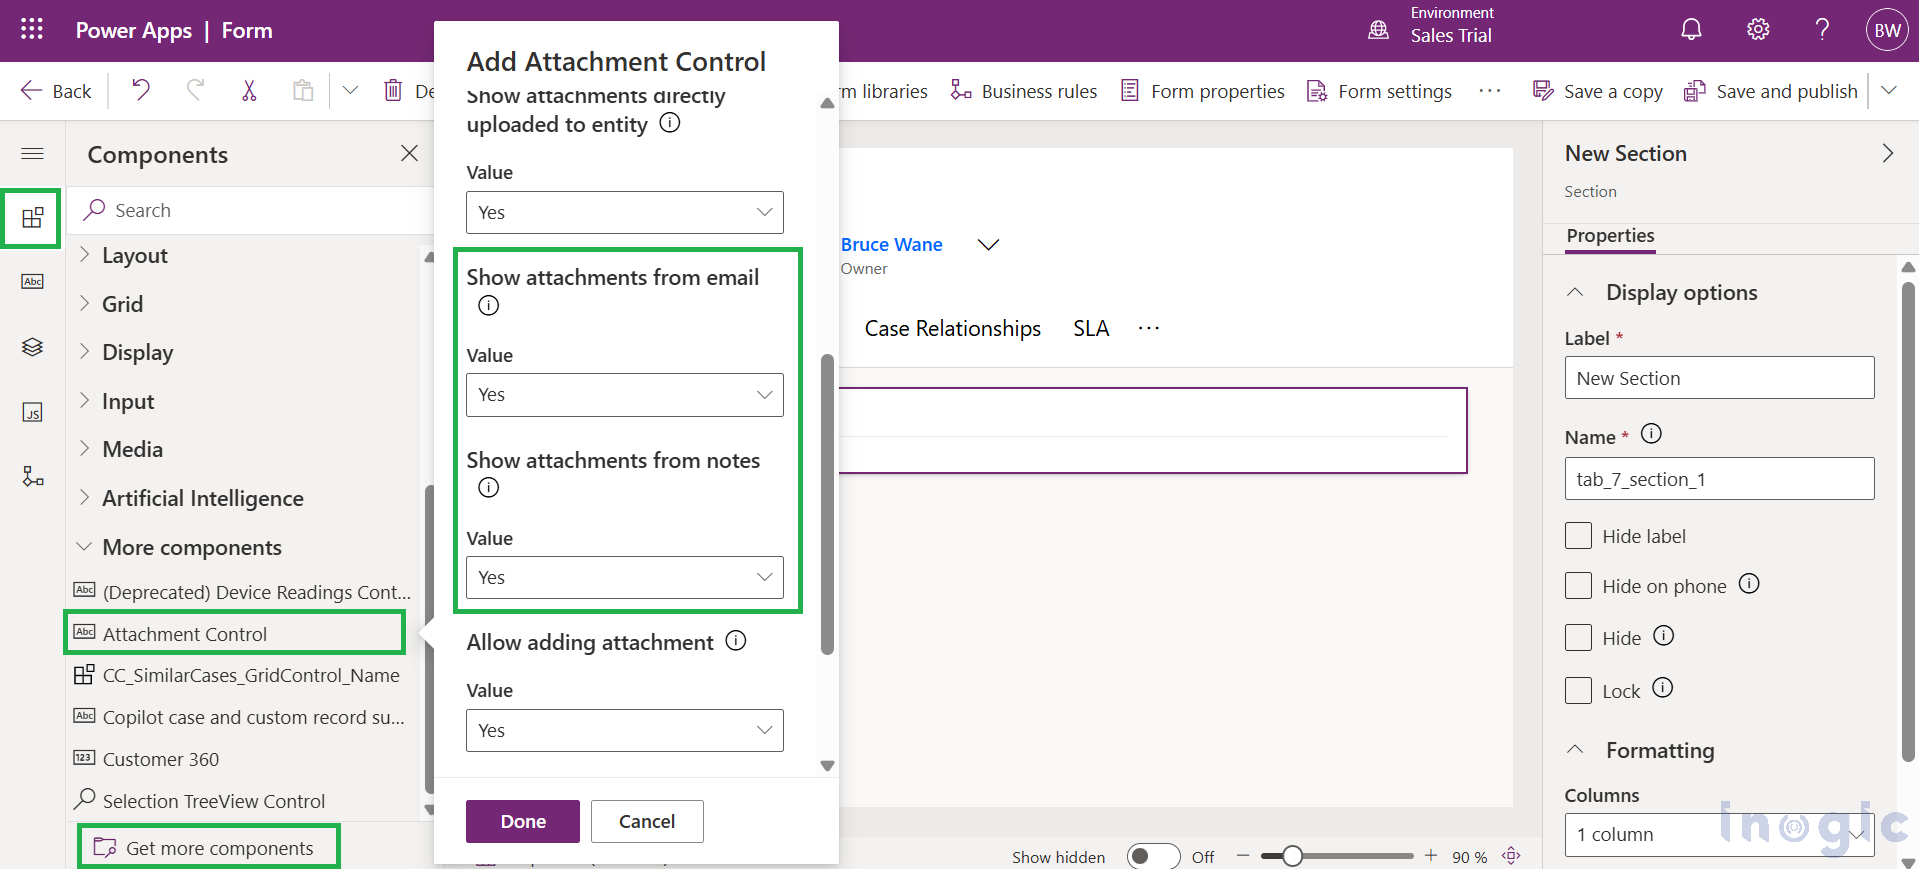
In the Components pane, select More components to explore additional controls.
Find the Attachment Control in the list. If it’s not immediately visible, click Get more components to load it.
Drag the control to the desired location on the form.
Configure its properties—for example, enable it to display attachments from emails or notes.
Save and publish the form to apply changes.
Read More>>


