How to Extend Microsoft 365 Copilot with agents?
Microsoft 365 Copilot is an AI-powered productivity tool that keeps users in the flow of their work across Microsoft 365 applications. It provides default experiences for engaging with content and resources from across an organization. Using Copilot Studio, we can extend Microsoft 365 Copilot with a specialized agent built in Copilot Studio.
There are two different ways agents can be added to Microsoft 365 Copilot:
- Declarative agents are a collection of custom knowledge (via instructions and grounding data), and custom skills (including actions, triggers, and workflows) hosted on the Microsoft 365 Copilot orchestrator and foundation models to power a conversational experience.
- Custom engine agents are developed using custom foundation models and orchestrators and can be tailored to specific enterprise needs with your own stack. These include agents built with Copilot Studio, Teams AI library, or Azure AI.
In this blog we can talk about creating a Copilot agent using Copilot Studio and how to Deploy it in Teams + Microsoft 365 channel.
Create an Agent using Copilot Studio:
- Custom Agent: License Helper – Consider we already have a Copilot Agent created using Copilot Studio

- This Agent is using Azure AI Search as knowledge source which has extensive details related to Licensing of different products.

- We can also configure Starter Prompts if required. Since this can help the users to kickstart the conversation quickly.

- Before we deploy this Agent into Teams + M365 channel, we can test it once inside copilot studio. It is bringing the Output from Azure AI search.

Connect to Teams + Microsoft 365 Channel:
- After publishing the agent, we can connect it to the Teams + Microsoft 365 channel to allow users to chat with it in Teams and Microsoft 365 Copilot.
- In Copilot Studio agent, On the top menu bar, select Channels. Select the Teams + Microsoft 365. The configuration panel appears.

- If you want your agent to be available in both Microsoft 365 Copilot and Teams, under Turn on Microsoft 365, select Make agent available in Microsoft 365 Copilot chat.
- Select Availability options. The Availability options page is used to distribute the agent to the agent’s author’s account to use or to small groups of peers governed by distribution lists, or to be published to the organization’s catalog by an admin.

- Confirm the agent isn’t shown to teammates or shared users. Remove it if it says Added to Teams.
- Select Show to everyone in my org.

- Review the requirements for submission and select Submit for admin approval.

- A final confirmation prompt appears. Select Yes to continue. The agent is sent to your admin for approval, and you can see a note indicating the status of your submission.

- Wait for the admin’s approval. You can check the latest status by selecting Refresh or opening the Make the agent available to others window from the Publish page.

Approve the Agent:
- For the Admin to Approve the Agent to be available for the entire org, we have to Navigate to Teams Admin Center.

- Click on the Manage Apps section. We will be able to see the Apps that are submitted and Pending for Approval.

- To find the Agent, you can use the search bar to provide the name of the Agent to search.
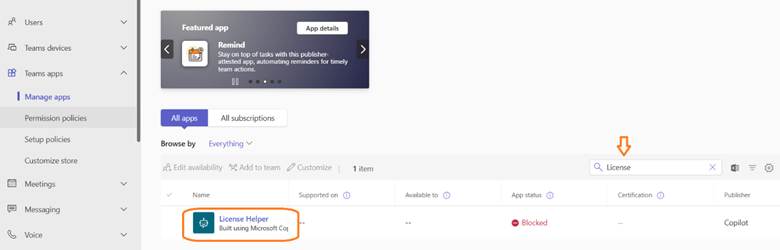
- We can see the Agent that we published is available now, but in Blocked Status.
- Click on the App and we can see the information related to that.

- Admin can review the details and go ahead to Publish or Reject the Approval.
- In this case, we will publish the Agent by clicking on Publish button.
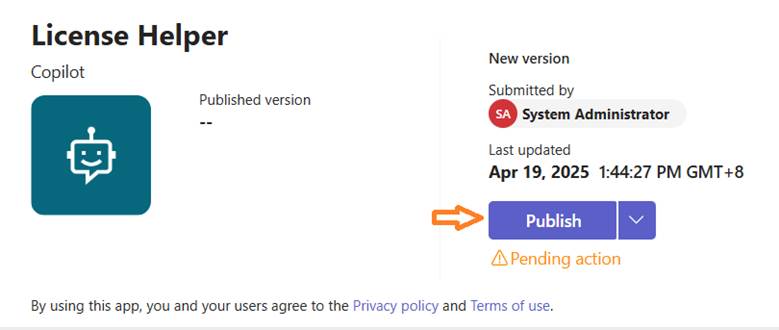
- A final confirmation popup, click on Publish button.

- Once Published, the app will be available across the organization. We can also see the pending Approval count updated as shown below.

How to Add the Custom Agent inside Teams and Microsoft 365 Copilot chat:
- In the M365 Copilot chat, we can create a new Agent or can add the existing Agent that we published in available for the entire Org.
- In the right pane, click on Get Agents. This will navigate to the Apps page.

- We can search for our agent on the Apps Page. We will be able to find our agent available.
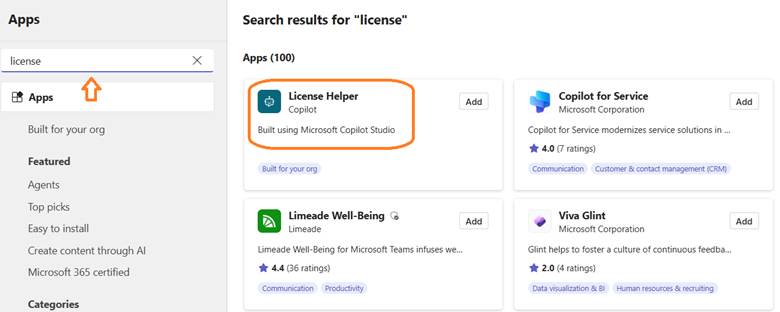
- Click on our Custom Agent and click the Add button.
- Please Note that in this trial version of M365 copilot chat, I’m unable to show you the App added inside the M365. So instead, we can check the same via Team.
- From the Teams, we can open the same Apps window and choose the Custom Agent that we built.
- Our Custom Agent will be added successfully.

- Once the Agent is successfully added, we can Pin the agent to the side pane for easy access.

- Testing the same Agent inside Teams to check if the response is provided.

- As expected, the Agent gives us a response based on the Azure AI search knowledge. In this way, we will be able to add multiple Agent to power up the M365 Copilot and Teams.

References:
Happy Copiloting !!!


