Autonomous agents are advanced AI systems designed to operate independently, managing and automating complex business tasks to enhance efficiency and innovation within an organization. Unlike simpler retrieval-based or task-based agents, autonomous agents do not require constant human input. Instead, they are pre-programmed to respond to specific triggers or events.
Key Characteristics:
- Proactive: Autonomous agents automatically respond to signals across the business, initiating tasks configured to react to events or triggers without human intervention.
- Independent: They seamlessly complete tasks behind the scenes without human intervention.
- Adaptive: These agents are non-deterministic, capable of producing different outcomes from the same initial conditions.
Sample Scenario:
An autonomous agent can be set up to manage incoming emails. When a new email arrives (the trigger), the agent automatically researches the questions asked using predefined knowledge sources and drafts a professional response. This process includes consulting internal documents, websites, and other resources to provide accurate and detailed answers.
Building an Autonomous Agent:
- Access Copilot Studio: Start by accessing Copilot Studio, where you can create and configure your agent.
- Define the Agent: Provide a name, description, and detailed instructions for the agent’s behavior.
- Add Knowledge Sources: Specify the sources the agent will use to gather information.
- Set Triggers and Actions: Define triggers that will activate the agent and actions it will take in response.
By leveraging autonomous agents, organizations can streamline workflows, reduce repetitive tasks, and improve overall productivity.
How to build a simple Autonomous Agent:
- Navigate to the Copilot Studio: Once logged in, you should see the Copilot Studio environment with options on the left-hand side. Click on the “Create” button to start building your autonomous agent.
- Skip to Configure: You can either describe your agent using the Agent Builder or skip directly to the configuration by clicking “Skip to Configure”.

- Name and Icon: Give your agent a name, e.g., “My Autonomous Agent”. You can keep the default icon or upload a custom one by clicking “Change Icon” and selecting an image file.
- Description: Provide a brief description of what the agent will do. For example, “You help with incoming emails to my inbox. You are a research assistant and look through all the questions that are asked in the email and do research for me.”

- To make sure our Agent is going to use only the Knowledge source that we specify, we can disable the Default AI Knowledge.

- Click on “Add Knowledge” and choose from public websites, SharePoint sites, Dataverse, or drag and drop files.
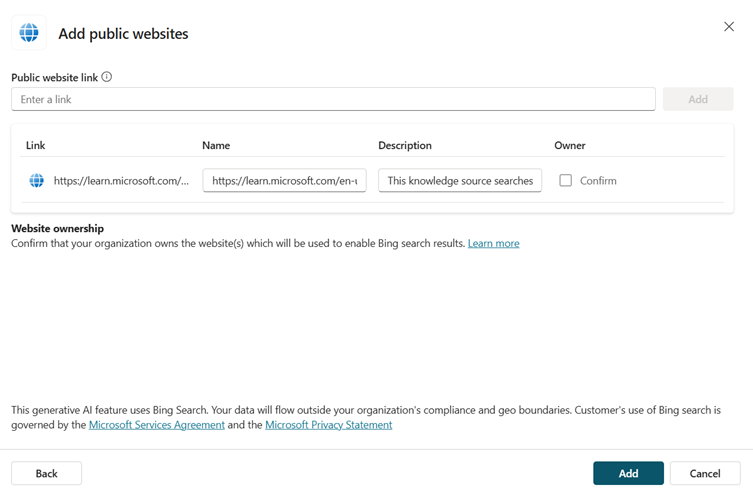
- For this Agent, I’m going to add two knowledge source – Public Websites and Files.

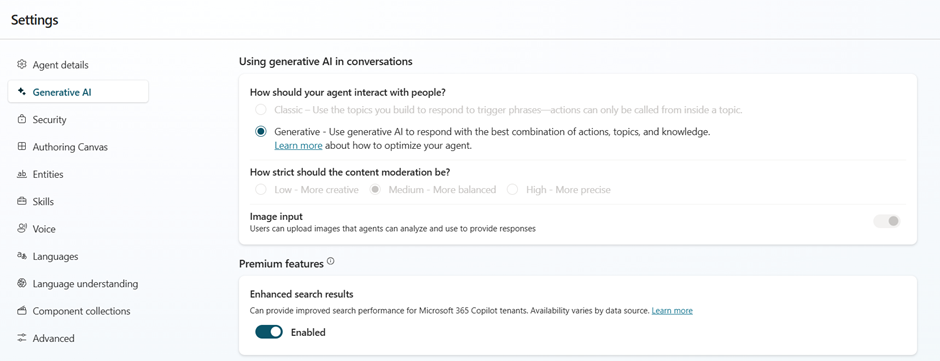
- Next step we can enable the Generative AI option from the settings.
- Add Action:
- Search for Action: Search for the action, e.g., “Send an email”.
- Select Action: Choose the appropriate action, such as “Send an email V2 Office 365 Outlook”.
- Configure Action: Ensure all parameters are set correctly and add the action.

- Make sure necessary permissions are provided. The Connection must be established.

- Once done, click on Add Action.

- Add Trigger:
- Search for Trigger: Search for the trigger related to email, “When a new Email arrives (V3)”.
- Add Trigger: Select and add the trigger.

- Again, check for the connections to be established or provide the necessary permissions.

- Now we have added an Action and Trigger to our Agent.

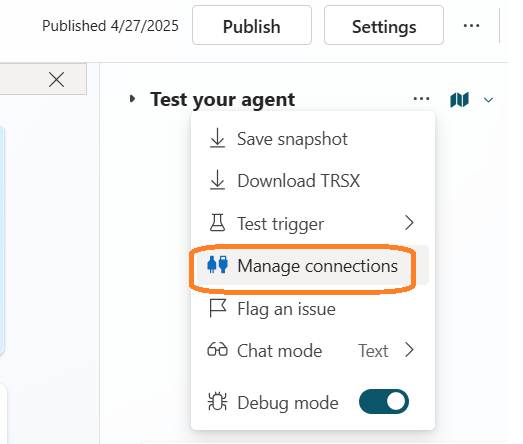
- Publish the Agent to make sure the changes are applied.

- Next step, inside Test your agent, go for Manage Connection.
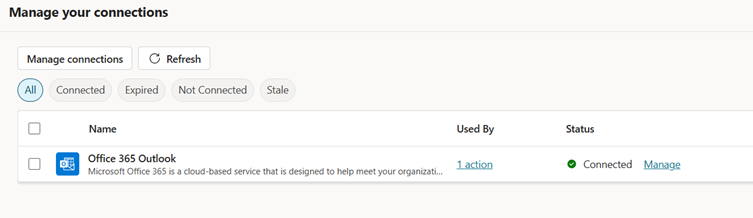
- You can find the Office 365 Outlook connection displayed.
- If not connected, please authenticate and make sure it is Connected.
*****Please note that I have noticed a Known Issue in this scenario. We shall continue to test the Agent to identify that issue. ****
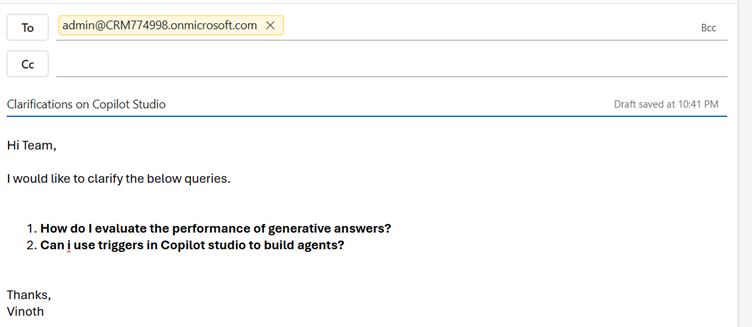
- Creating an Email message to be sent with some queries to send to the mailbox.

- This email is received inside the mailbox which Autonomous Agent is using.

- But there are no actions. Agent doesn’t send any response.
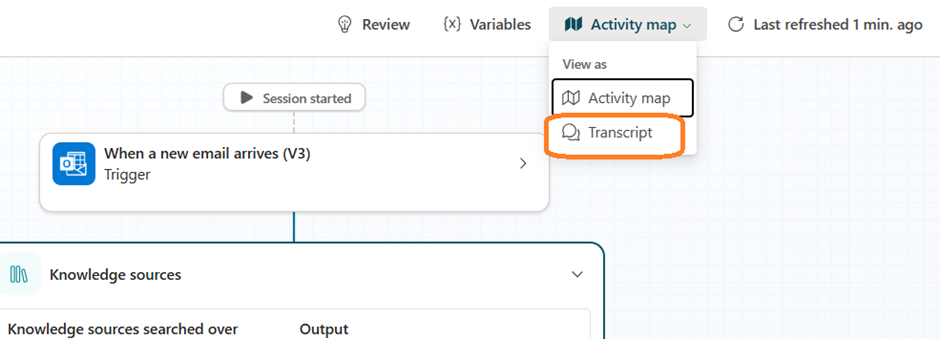
- To check that, Navigate to the Activity tab. We could see the Run available there.

- Click on the Activity to check the details.
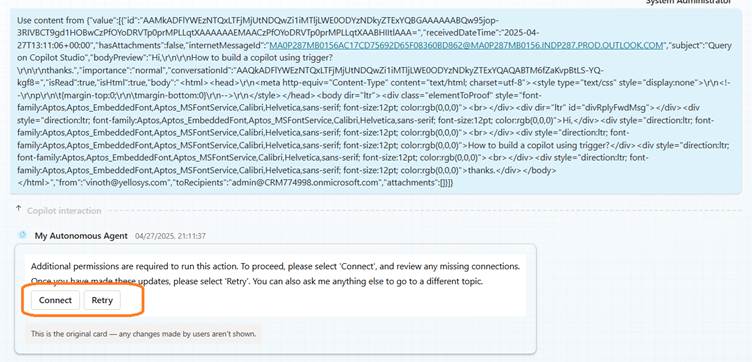
- We can see that Agent triggers and able to get the response also. But at the final step it is displayed as “Waiting for user”.

- To Investigate further, click on Transcript from the Activity map.
- Though we click on Connect or Retry button, it does not work.
- To resolve this issue, debug the browser by clicking on F12 (in chrome). We just need to open the developer tools in any browser.
- In the Elements, Search for Copilotstudio.microsoft.com. We can find the button element as shown below.


- Please copy that section displayed to extract a link.
<button type=”button” tabindex=”0″ role=”link” class=”fui-Button r1alrhcs ___fjitxu0 fy77jfu” aria-label=”Connect” title=”https://copilotstudio.microsoft.com/c2/tenants/47a3f3bc-94e3-xxxx-xxxx-fdf8d9c5626e/environments/2d98e58c-b020-ec07-b12d-7fa86c643d86/bots/cr96a_myAutonomousAgent/channels/pva-autonomous/conversations/126c7bcc-8bb1-4a48-b7f8-95ca5e6509a5/user-connections” aria-describedby=”https://copilotstudio.microsoft.com/c2/tenants/47a3f3bc-xxxx-xxxx-80ba-fdf8d9c5626e/environments/2d98e58c-xxxx-ec07-xxxx-7fa86c643d86/bots/cr96a_myAutonomousAgent/channels/pva-autonomous/conversations/126c7bcc-8bb1-4a48-b7f8-95ca5e6509a5/user-connections”><div class=”ac-pushButton-content noIcon style-default” style=”display: flex; gap: 6px; align-items: center; justify-content: center; min-width: 0px; flex: 0 1 auto;”><div style=”overflow: hidden; text-overflow: ellipsis; white-space: nowrap;”>Connect</div></div></button>
- Below is the link I extracted.
https://copilotstudio.microsoft.com/c2/tenants/47a3f3bc-xxxx-xxxxx-xxxx-fdf8d9c5626e/environments/2d98e58c-b020-ec07-b12d-7fa86c643d86/bots/cr96a_myAutonomousAgent/channels/pva-autonomous/conversations/126c7bcc-8bb1-4a48-b7f8-95ca5e6509a5/user-connections
- When open the link, we can see the manage connections page where the Office 365 Outlook connection still shows that it is not connected.
- That’s the reason the Action was not working.
- Click on connect and make sure it is authenticated again.

- Now the Actual connection is established again.

- Again, we can retest out Autonomous Agent.
- Sending another email to the mailbox with some queries.
- This email is being received inside the Mailbox that is connected with our Agent.

- We can go and check the Latest Activity. It shows that the session is complete now.

- Now we go back to the Sender’s mailbox to check if the response is received.
- We can see the below response

- We can try again by sending another Query in email.

- We can see the response is received automatically from our Agent.
References:
Happy Copiloting !!!!


